You want to learn about how to create a 3D ice effects so you are on the right place, here is a Photoshop Tutorials to learn how to make a 3D ice blocks design, ice effect are useful to create a nice looking backgrounds, textures and graphics.
This 3D effect photoshop tutorial is made by Easy-Psd and will show you how to create abstract ice blocks background.

We need this big because in the end we will use just 1/4 of the original size. Press “D” to put the foreground color to black and the background color to white. Now just apply Filter-Render-Clouds.

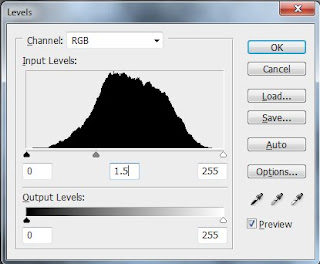
The image got some very dark areas so we will modify the levels . Press Ctrl+L and apply the settings like in the image below:
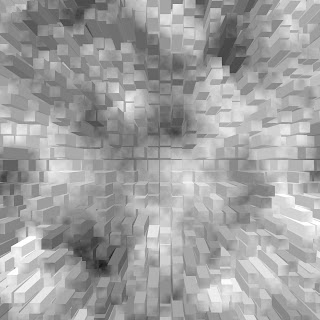
Now will come the nice part. With just a few clicks we will obtain an amazing effect. Go to Filter-Stylize-Extrude and select “Blocks” with 40 pixel size and 40 Depth. You will get something like this:
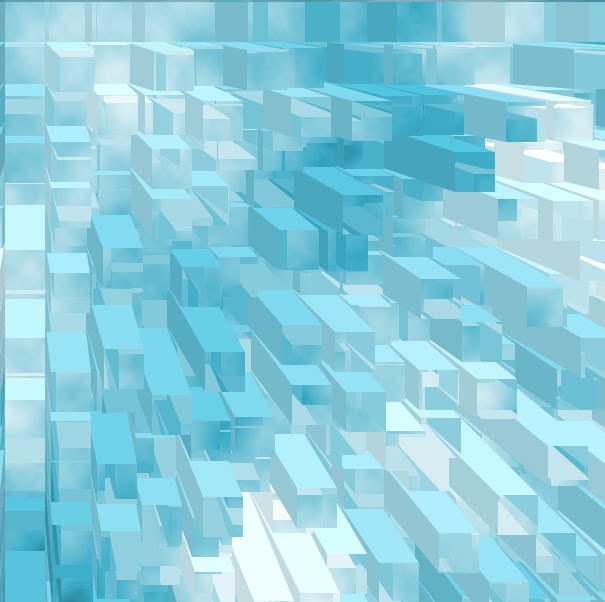
For the Ice Blocks to look more real we need to change the color. For this we will press Ctrl+U and we will play around with the options until we get a light blue color.

Now hit Ctrl+F to apply the last filter again and you will get an abstract ice block image. I think the image look good but for a better visual effect I decided to cut of a half of the image because of the extrude filter. After cutting out 1/4 of the image i got something like this:
Republished by Imagincreation